 Arlington Restoration Group
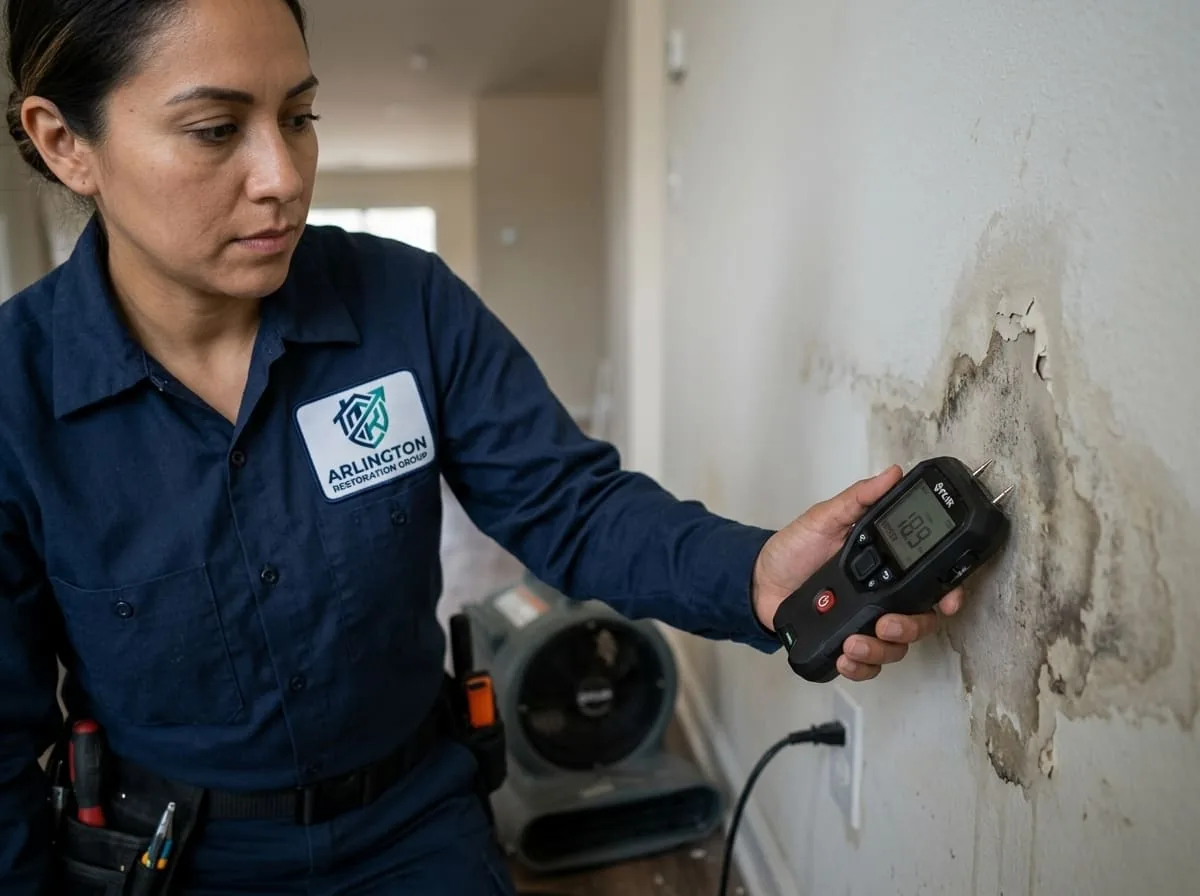
Why Hidden Moisture Is the Hard Part of Water Damage
The water you can see is rarely the whole story. Drywall, paint, and trim can look completely dry within a day of a leak while the paper backing of the drywall, the wood framing behind it, and the insulation inside the wall cavity are still holding a meaningful amount of moisture.
That gap between "looks dry" and "is dry" is exactly why professional water damage assessments rely on tools that can measure or indicate moisture without cutting the wall open, rather than judging by appearance or touch. Two tools do most of that work: moisture meters and thermal imaging cameras. They measure different things, and understanding what each one actually tells you helps make sense of how a drying plan gets built.
Moisture Meters: Pin and Pinless
Moisture meters give a numeric reading of moisture content in a material, and they come in two general types that are often used together.
Pin-Type Meters
A pin meter has two small metal probes that make contact with (and slightly penetrate) the surface of the material being tested. It reads moisture by measuring electrical resistance between the two pins — wet wood or drywall conducts electricity more readily than dry material, so lower resistance translates to a higher moisture reading.
Because the pins make actual contact, this method gives a fairly precise reading at a specific point and depth, which is useful for confirming a reading taken by other means or for testing framing members directly once a wall has been opened. The tradeoff is that it leaves two small puncture marks, which matters on finished surfaces you'd rather not mark up unnecessarily.
Pinless (Non-Invasive) Meters
A pinless meter is pressed flat against the surface and uses electromagnetic or capacitance sensing to estimate moisture content in the material beneath it, without puncturing anything. This makes it the practical choice for scanning across large areas of drywall, flooring, or trim quickly to identify where moisture levels are elevated relative to the surrounding, unaffected material.
It's a comparative tool as much as an absolute one: a technician typically checks an unaffected reference area of the same material first, then compares readings from the area of concern against that baseline. A pinless reading that's meaningfully higher than the dry reference area indicates elevated moisture in that section of wall or floor, even though the surface looks and feels normal.
In practice, both types tend to get used on the same job: pinless meters for fast, non-destructive scanning to map out how far moisture has spread, and pin meters for more precise, targeted readings once the general area of concern is identified.
Thermal Imaging Cameras: What They Actually Show
What Thermal Cameras Actually Detect
Thermal (infrared) cameras are a genuinely useful tool in a water damage assessment, but it's worth being precise about what they detect, because they're often misunderstood. A thermal camera does not detect moisture directly. It detects surface temperature differences, and displays them as a color-coded image.
Wet materials often show up as cooler than surrounding dry materials because evaporation has a cooling effect, and wet materials also tend to have different thermal conductivity than dry ones, which can create a visible temperature pattern on a wall or ceiling surface.
Confirming What the Image Shows
That distinction matters because temperature differences can be caused by things that have nothing to do with moisture: a missing patch of insulation, an air draft behind an outlet, a stud or joist showing through drywall, or even just a difference in what's on the other side of the wall.
A thermal image is best understood as a way to quickly identify areas worth investigating further, not as a moisture reading on its own. That's why a thermal scan showing a cool or irregular pattern on a wall or ceiling is typically followed up with a moisture meter reading at that specific spot to confirm whether elevated moisture is actually present, rather than treating the thermal image alone as proof of a wet wall.
Used correctly, this combination is efficient: the thermal camera covers a large area quickly and flags where to look closer, and the moisture meter confirms and quantifies what's actually happening at those flagged locations.
How This Gets Turned Into a Drying Plan
On an actual job, a technician typically works room by room, scanning walls, ceilings, and floors with a thermal camera to flag irregular areas, then confirming those areas with pinless and, where needed, pin-type moisture readings.
The readings get documented against dry-material baselines specific to the type of material (drywall, wood subfloor, plaster, and so on don't hold or release moisture the same way), which is part of what determines where air movers and dehumidifiers get placed, whether any material needs to be removed to reach moisture that's trapped too deep to dry in place, and how drying progress gets tracked over the following days.
This documentation also tends to matter for insurance purposes, since it creates an objective record of the affected area rather than relying on a visual description alone.
For more on what happens once the moisture mapping is complete and drying equipment goes in, see structural drying and dehumidification. And for damage specifically affecting ceilings and walls, including when materials need to be opened up to reach moisture that non-invasive tools can't fully resolve, see ceiling and wall water damage.
Why This Matters More Than It Might Seem
Skipping this kind of moisture mapping and just drying the areas that look wet is one of the more common reasons water damage recurs as a mold problem weeks later. A wall that looks and feels dry to the hand can still be holding enough moisture inside the cavity to support mold growth on the back side of drywall or inside insulation, completely out of sight.
Proper moisture detection isn't an extra step tacked onto drying — it's what tells the difference between a wall that's actually dry and one that only looks that way from the front.
How Different Materials Hold and Release Moisture
Part of why a single moisture percentage doesn't mean the same thing everywhere in a house is that different building materials absorb, hold, and release moisture at very different rates, which is why moisture meters are calibrated to material type rather than giving one universal reading.
- Drywall (gypsum board) absorbs water quickly through its paper facing and porous core, and tends to wick moisture upward from a wet baseboard area well beyond the visible waterline, which is why a moisture scan on a wall often needs to check well above where the water actually appeared to reach.
- Plaster, common in some of Arlington's older homes, behaves differently than modern drywall — it's denser and can hold moisture longer in some cases, or read differently on a meter depending on the lath and coat construction behind it, which is part of why an experienced technician adjusts expectations for older construction rather than applying a one-size approach.
- Wood subflooring and framing can absorb a significant amount of moisture and are slow to release it, especially in enclosed spaces like under carpet or inside a wall cavity with limited airflow, which is why framing is often checked directly with a pin meter once it's accessible.
- Tile, stone, and grout are largely non-porous themselves, but the substrate and adhesive beneath them can trap moisture that doesn't show up in a surface reading at all, which is one of the trickier situations for moisture detection and sometimes calls for checking adjacent, more accessible materials as an indicator.
- Insulation inside a wall cavity can hold moisture for an extended period and, once wet, often loses much of its effectiveness even after the surrounding materials dry — which is one of the reasons insulation sometimes needs to be replaced even when the drywall covering it is salvageable.
Why a Quick DIY Check Isn't a Substitute
Inexpensive consumer moisture meters exist and can give a general sense of whether a material is unusually damp, but they typically aren't calibrated across the range of building materials found in a typical house, and a single reading without a proper dry-material baseline for comparison can be misleading — a normal reading for drywall might look alarming compared to the baseline for wood, for example.
Consumer thermal cameras and phone-based thermal attachments have similar limitations: lower resolution and sensitivity than professional-grade equipment can mean subtle temperature differences that indicate a real moisture problem simply don't show up. These tools aren't useless for a homeowner's first look, but they're better treated as a reason to get a professional assessment than as a final answer on whether a wall is actually dry.
What the Documentation Is Used For
Beyond guiding where drying equipment gets placed, the moisture readings and thermal images taken during an assessment typically become part of the documentation for the job — a record of the affected area's extent and condition before drying began, and later, a record confirming the area reached an acceptable moisture range before the job was considered complete.
That documentation is often useful for insurance purposes, since it provides an objective, measured account of the damage rather than relying solely on a written description or photographs of visible water.
Frequently Asked Questions
Does a thermal camera actually see moisture inside my walls?
Not directly. A thermal camera reads surface temperature differences, which can indicate the presence of moisture because wet areas often read cooler due to evaporation, but temperature differences can also come from drafts, missing insulation, or framing behind the wall. That's why a thermal reading is typically confirmed with a moisture meter before being treated as evidence of a wet wall.
What's the difference between a pin and pinless moisture meter?
A pin meter has two small probes that contact the material and measure moisture through electrical resistance, giving a precise point reading but leaving small marks. A pinless meter is pressed against the surface and estimates moisture using electromagnetic sensing without puncturing anything, which makes it better suited to quickly scanning large areas.
Can moisture meters damage my walls or floors?
Pinless meters don't puncture the surface at all. Pin meters leave two small pinholes where the probes contact the material, which is a minor and typically unnoticeable mark, especially compared to the alternative of not knowing whether a wall is actually dry.
How do professionals know what a 'normal' moisture reading is for my house?
By taking a reading from an unaffected area of the same material as a baseline — for example, drywall in a room that wasn't affected by the water event — and comparing readings from the area of concern against that baseline, rather than relying on a single fixed number that would apply to every material and every house.
If a wall feels dry, why would it still need to be checked with a meter?
Surface dryness and material moisture content aren't the same thing. Drywall paper and paint can feel dry to the touch within hours while the gypsum core, insulation, or framing behind it is still saturated. A meter reading is what actually confirms whether the material itself has returned to a normal moisture range.
Do I need to open up my walls to find hidden moisture?
Not always. Non-invasive tools like thermal imaging and pinless moisture meters can identify and map a lot of hidden moisture without opening anything. Materials sometimes still need to be opened or removed when moisture is trapped too deep to reach with surface drying, or when the material itself has been compromised, but that's determined by the readings rather than assumed upfront.